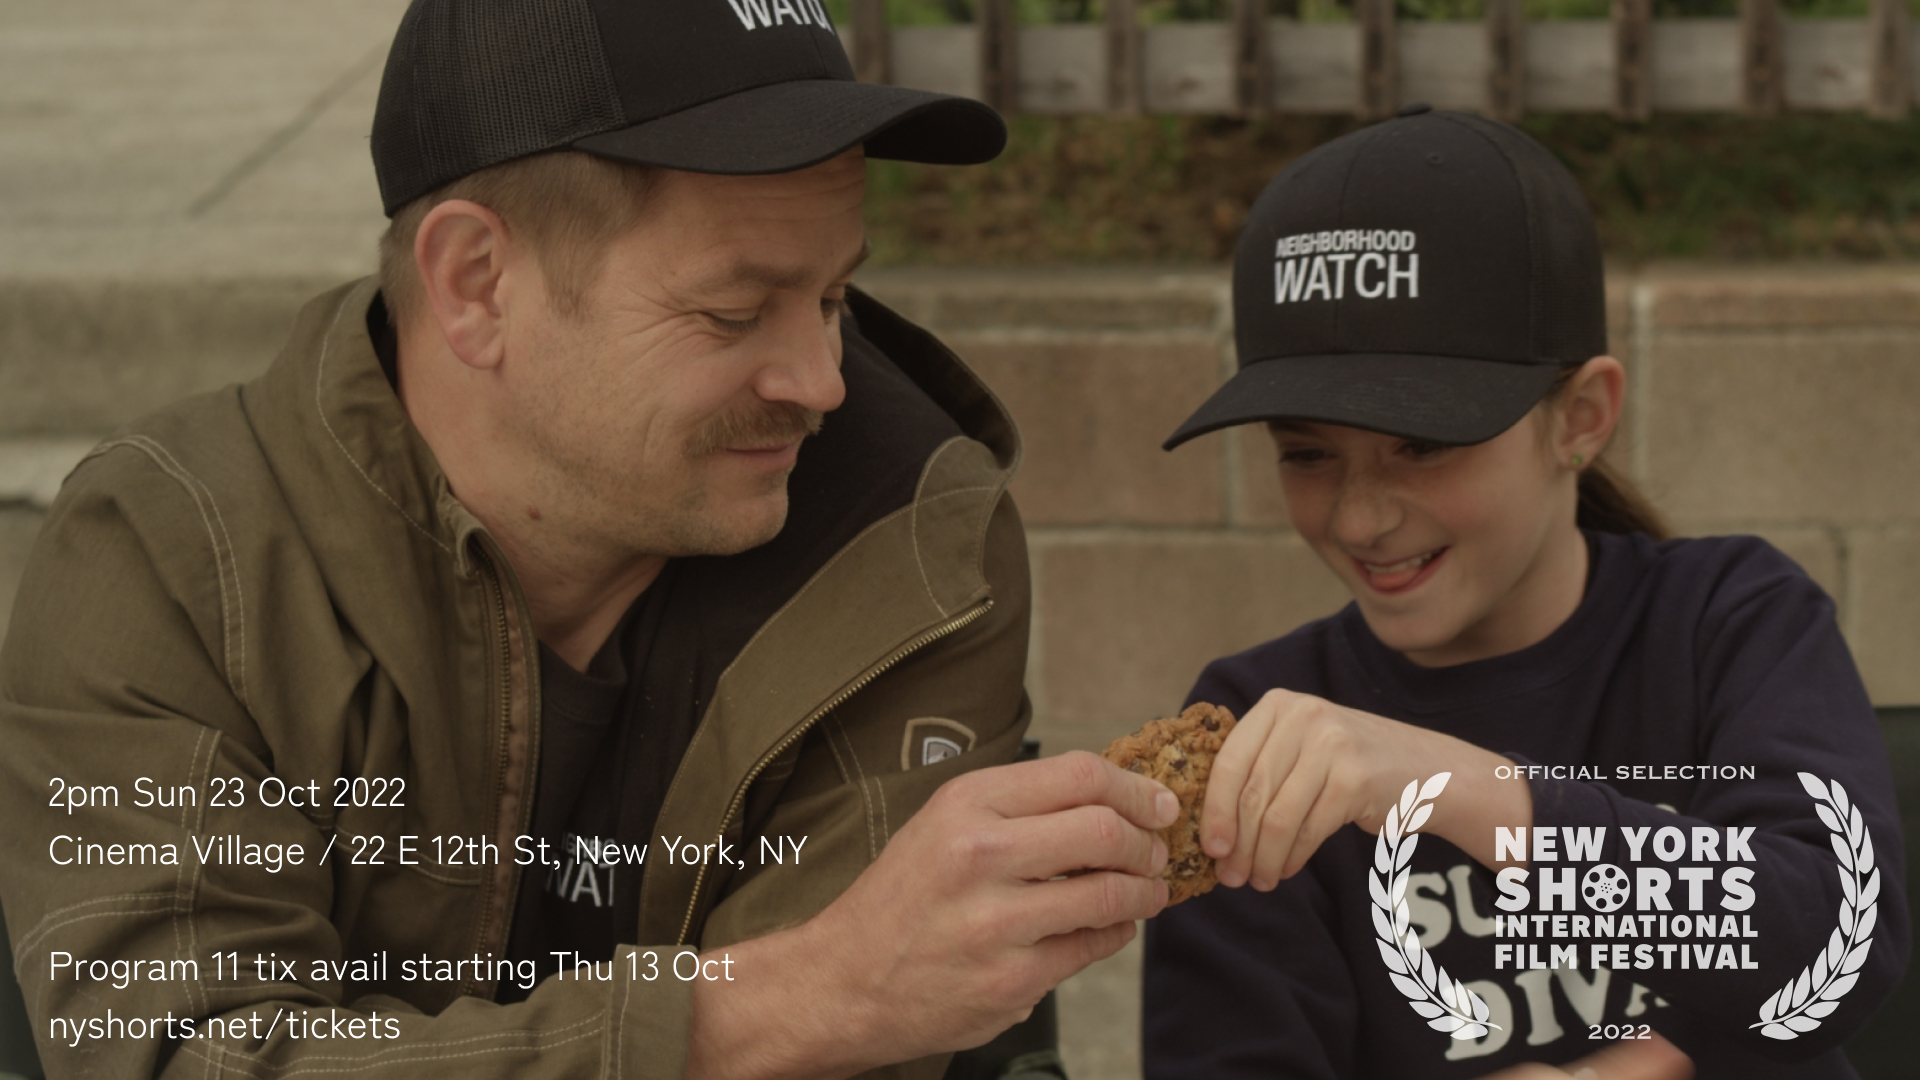
I’m very excited to say that Super Diva! — the short film I directed in Mar — will be screening at 2pm on Sun 23 Oct 2022 at Cinema Village as part of the New York Shorts International Film Festival.
- Buy Program 11 tix
- Watch the trailer
I’ll be there / hope to see you if you’re in the area =)
Now, for the devlog portion. Since it’s kind of fresh on my mind, some notes on post-production…
post production notes
I’ve been using DaVinci Resolve for my entire post-production workflow. Most people just use Resolve for color grading/correction, but I like that you can do the editing, sound, and delivery all in the same place. And it has fantastic cloud multi-user support.
Here is the notebook of things I’ve learned along the way — warning: this is sprawling! it’s more of a search index (I refer to it all the time) than something you would read end to end.
editing
The standard advice from most directors on editing is: don’t edit your own footage, because:
-
You might be less willing to “kill your darlings” than someone who was not involved with production (ie doesn’t know how much pain and money was spent getting each shot).
-
Why not get someone else creative involved for the first cut? Fresh eyes might come up with something great you didn’t see.
I think there’s merit to both of these arguments, but I did the editing for Super Diva! myself because
-
I really enjoy editing — the sense of timing, the musicality, the iterative feedback loop.
-
Editing has taught me a ton of lessons about how to shoot / compose / light better in the future, and I learn more every time I edit.
-
I was self funding this short and went over budget, so I wanted to spend money only on the roles / tasks I knew couldn’t brute force myself with time and sweat.
sound
I knew I wanted to have a professional sound mixer on set (capturing bad sound is really not something you can fix after the fact), but I originally thought that if we captured good sound during production, then maybe I could do a passable job of the post-production sound mix myself.
So, I spent a few weeks cleaning up the sound with the Fairlight tools in DaVinci Resolve. Along the way, I learned a ton — from YouTube videos, from this excellent course Resolve 17 End to End, and from this 643pp manual on Fairlight Audio in Resolve 17.
Eventually, I got my mix to a “somewhat decent” status — and maybe given an additional month or two I could have gotten the mix to “good” status — but it probably still wouldn’t be as good as what a pro could do in a few hours.
So I hired a professional post-production sound engineer to spend a day and a half creating a stereo mix with Pro Tools. He discarded my mix, started from scratch, and quickly produced something more polished.
One frustrating bit of this process: because he used Pro Tools, I had to export of everything in a particular format and send it over to him. Then he sent back mixed down wav files — a final mix as well as separate tracks for music, fx, and dialog — and then I had to reimport everything back into DaVinci. This round trip — which is industry standard, as far as I can tell — is a sort of “lossy” operation, where the wav files just contain the final results of the tweaks made in Pro Tools, with no information about specific adjustments. This adds annoying overhead, and I also think it introduces a layer of opacity that kind of prevents you learn from what the other person did. From my perspective, it would be WAY BETTER to keep everything in Resolve — but I suppose this would entail some sort of weird constraint both on the delivery format AND the tools the engineer uses to work, the equivalent of specifying “you must use TypeScript and you must write it in Vim” for a software project…
Anyway, later, when I got accepted to New York Shorts International Film Festival, they asked for a 5.1 audio mix. By this point, I had kind of burned through my post-production sound budget, so I consulted the Fairlight manual and a bunch of YouTube videos and learned how to do a quick and dirty version of this myself (notes on this here).
music
This was another area I knew I’d need help with from the beginning. I would have loved to have used tracks from the popular canon, but the licensing fees would be impossibly expensive.
So I found a composer. It was a ton of fun working with him — and extremely satisfying to replace the placeholders with his original tracks!
color
We shot digital, and based on my past experience of working with color in Resolve, I knew this was another task that was definitely beyond my skill level, so I hired a professional colorist.
The colorist did excellent work, particularly around adjusting the exposure / temperature of exterior shots where continuity was not working — the story takes place in a single day, but due to location availability, we had to shoot some early evening scenes in really harsh mid-day light and even within scenes we shot in a single afternoon, dramatic changes in the cloud cover affecting lighting noticeably in the rough cuts. Our colorist did a lot to smooth this over.
One thing that was nagging me after I had got all the graded shots back from the colorist and sat with them for a few weeks was a reddish hue of the skin tones. Rather than coordinate another hard drive hand-off / back and forth with the colorist, I decided to try to take a stab at improving this myself (with Rob).
I loaded up some reference photos in resolved and looked at the Vectorscope for skin tones to see how they compared to the scopes for the short, and it turned out the culprit was not really Hue or Temperature, but Saturation (the skin Vectorscope for most shots when using Qualifier to select skin generally fell along the right line on the Vectorsope, but had a much larger radius than the reference, which meant the skin was just far more saturated).
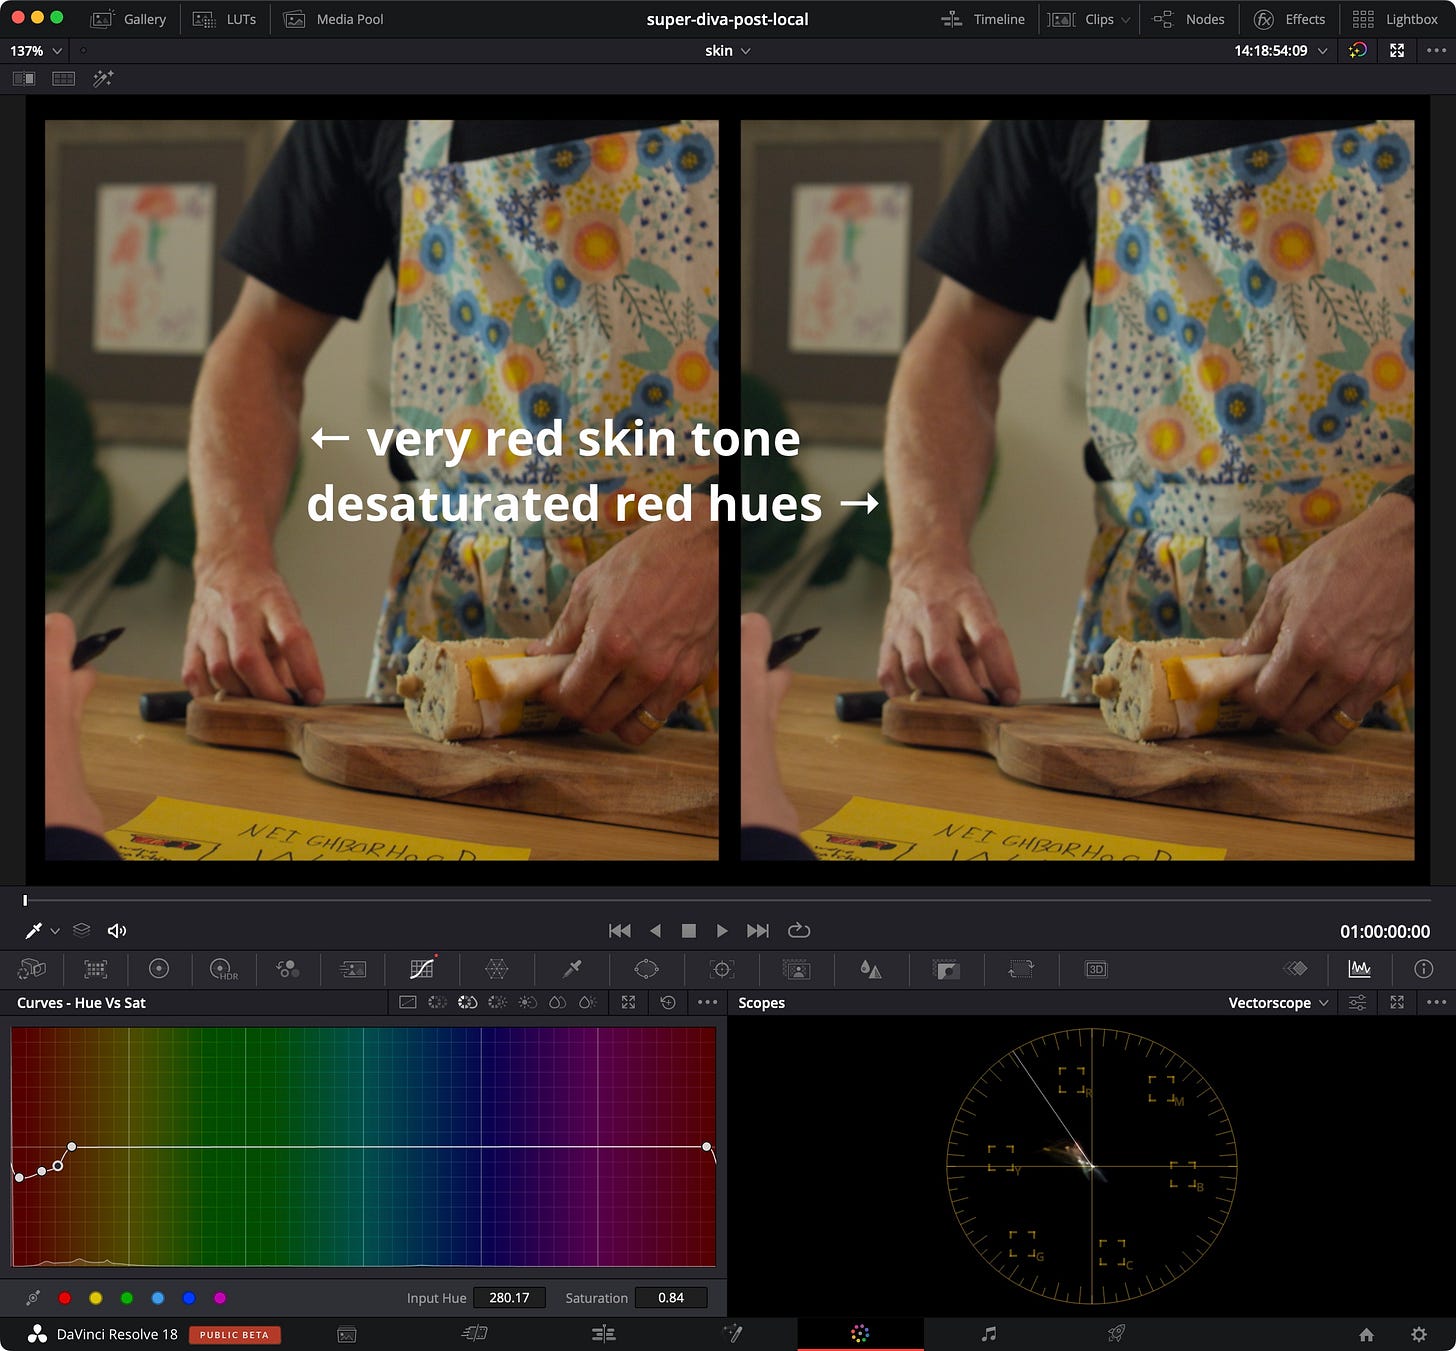
We ended up with a pretty good result by just de-saturating the reds and oranges a bit with Curves - Hue Vs Sat — which was far easier to replicate across all clips than if we had tried using the Qualifier to make the adjustments.
In one shot we had to use a tracker to make sure our adjustments did not affect another object in the shot — I’m kind of surprised we only ran into this once:
![]()
![]()
You can read more of the details about this process here.
next
That’s about all I’ve got to note on the post-production for Super Diva!
Hope to see you on Sun 23 Oct for the short if you’re in the area.